The Ultimate DIY Germination Chamber
I want to let you in on a little DIY project that has the potential to make a HUGE difference in our farm (and your farm too!). It’s cheap. It’s easy. Anyone can do it with a few power tools and a trip to your local hardware store.
This is the 4th season for our farm – can you believe it? Me either. Time has flown by and that’s because it’s fun! There is always something to do. Being a farmer means that there is ALWAYS a problem to solve and a project going on to improve the profitability and efficiencies of the farm. Over the years, we have struggled with one problem in particular – seed starting. OH the frustrations that seed starting brings! Seedlings are too hot, too cold, don’t have enough moisture. Each seed has their own requirements and we were (and still are) primarily starting seeds out of our basement. We started some seeds successfully, but we never had the germination rate we wanted and always felt like we never had enough seedlings. In a pinch we have had to buy plugs in of flowers which can be incredibly expensive!
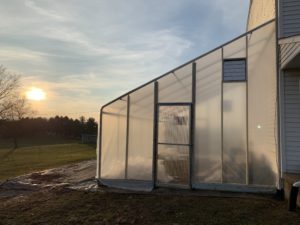
This season, our #1 goal was to figure out seed starting. The plan was two fold. First, we needed to germinate our seeds better and at a higher rate. Second, we need to have a small propagation house with a heater so we have a place for the seedlings to go after they have been germinated. It doesn’t take long for our basement lights to fill up with seedlings, and suddenly, we don’t have any more room to grow anything else. So, that’s what we did! Our propagation house was our big project of this year and it has been built and is in the final stages getting the propane heater installed – yay! More on that later.
Yes, we are excited about the new propagation house, but I have a secret to tell you.
The DIY Germination Chamber we built has been the STAR OF THE SHOW. For those of you who don’t know what a germination chamber is, it’s a closed chamber that provides an optimum humidity and temperature control to help start seedlings. Providing the optimum growing environment can decrease germination times and improve germination rates. The commercially made and sold germination chambers are amazing – and SUPER EXPENSIVE. A commercial germination chamber can run anywhere from $4,000 and up based on how many bells and whistles there are.
Excuse me while I do a happy dance when I say this but, our DIY version only cost about $250. And it wasn’t rocket science to put it together, either! You might have some of the parts already at home which would make the project even cheaper – a total WIN!
We purchased an online course from Small Farm University. Farm consultant Michael Kilpatrick of In the Field Consultants walked us through the entire project. In addition to walking you through a detailed step by step how-to, the course comes with a list of germination chamber parts for the project and where you can find everything you need. I promise buying his course is incredibly worth it and it is only $37! You can (and will) make that back in one full tray of seedlings!
We are so excited to see the impact this tiny project will have on our farm this year!
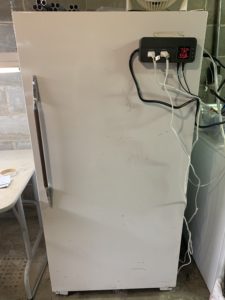
If you are planning to put your germination chamber in your greenhouse/propagation house where it will be in hot temperatures in the summer, you will probably need a working chest freezer so that you can add a cooling component to your germination chamber. We just start all the seedlings in our basement so we were able to use a non-working chest freezer. All it took was one Facebook post asking our friends and family if anyone had a non-working freezer – and we were flooded with responses! We offered to move it for free, and people were happily ready to give up their freezer. Thanks to the two sweetest people alive (shout out to Linda and Harvey Wagner!) we were able to get our chest freezer for free!
And off we went! We purchased all the hardware products at our favorite local hardware store, Hartville Hardware! Honestly, there is no other place you can wander around with a parts list and have 5 different knowledgeable sales people ask you if you need help. Just another reason to support local! And Hartville Hardware is one of our favorites! What we couldn’t get there, we purchased online and in about 4-5 hours, we had our germination chamber up and running.
Let me show you around!
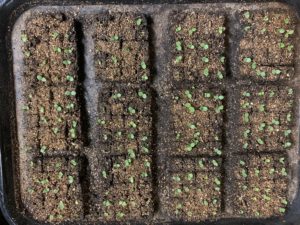
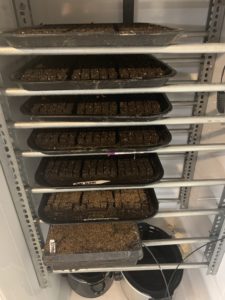
The germination chamber has an easy and adjustable racking system which is genius! Our freezer is not very wide, so we can fit our soil block trays in no problem. Some wider models would be able to fit 2 standard trays in side by side.
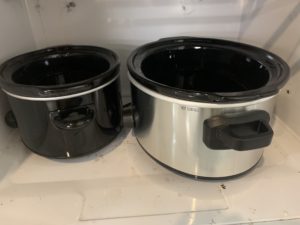
The heat and humidity of the chamber is created by two crockpots. Yes, you read that correctly! The larger is filled with water and creates humidity and the smaller is filled with water and a layer of oil and it creates the warmth.
Everything is controlled by a temperature and humidity monitor that you set manually and mount to the front of the freezer. Just set it and forget it! Surprisingly, the heat sensor works really well and the seedlings typically never get within 1-2 degrees of where I set it. Once you have your germination chamber up and running, it only takes a few minutes a day to manage.

And that’s it! We can’t wait to see the impact that this tiny project will make on our farm in 2019!